DIY Watch Box
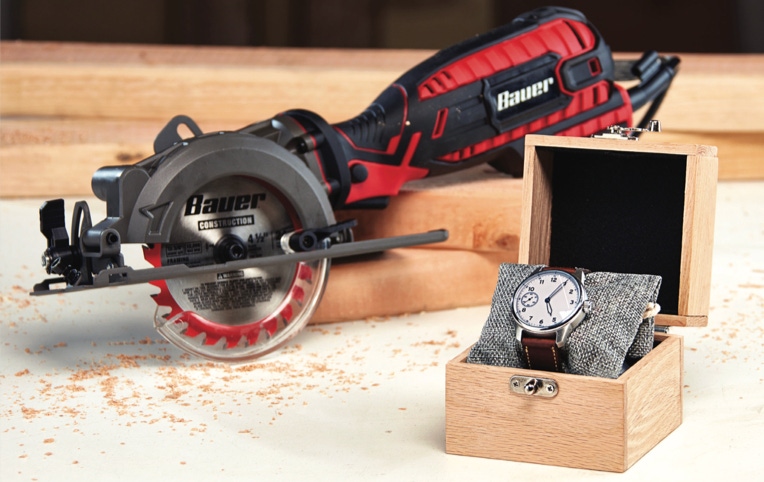
This time the best gift is the box itself! A project perfect for a beginner woodworker, give your DIY Watch Box a personal touch. Customize it with decorative clasps and hinges, wood stains, and engravings!
Download PDF Guide- (1) 2 ft. x 3.5 in. x 0.25 in. Oak Hobby Wood Board
- (1) Clasp (Choose a Set with 0.25 in. Screws)
- (2) Mortise Hinges (Choose a Set with 0.25 in. Screws)
- Sanding Sheets
- Wood Glue
- Masking Tape
- Black Felt
- (Optional) Scrap Fabric (at least a 4 in. x 4 in. square)
- (Optional) Pony Beads
- (Optional) Thread
-
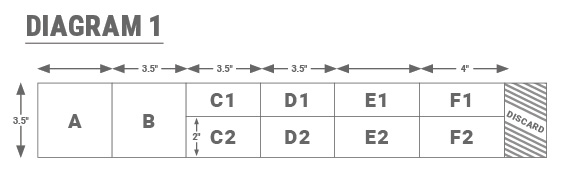
Cut the hobby board into the 10 pieces that will make up the box. Use the dimensions in Diagram 1. We recommend using the Bauer 5.8 Amp, 4-1/2 in. Compact Circular Saw (Item 56164) for speedy cuts.
TIP: For beginners, measure out and cut each piece at a time. This will give you more accurate pieces so that you don’t have to account for blade thickness.
- Lightly sand the pieces using 60-grit paper to ensure each has straight 90° edges.
-
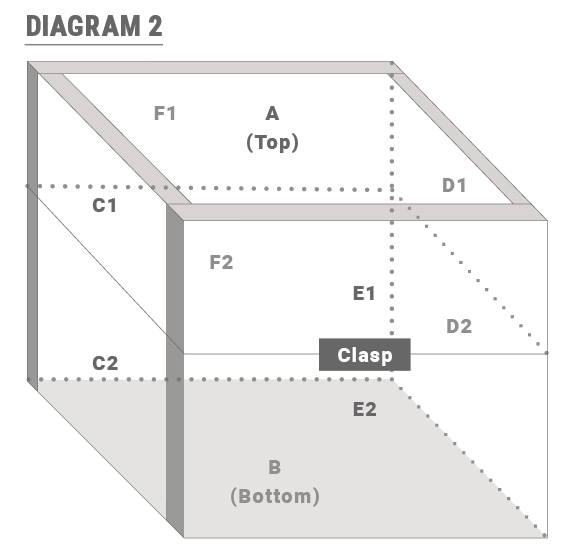
Use wood glue to attach all the pieces according to Diagram 2. Allow the glue time to bond.
- Sand the entire piece again to smooth the surface and lightly round sharp edges. Sand with the grain of the wood, using 60, 100, 150, then 200-grit sandpaper.
- Place the clasp where you plan to install it on E1 and E2. Temporarily secure it with masking tape. Use the Bauer 3.5 Amp, 3/8 in. Variable Speed Close Quarters Drill (Item 57148) to create a pilot hole. Use the Warrior 19-in-1 Compact Cordless Screwdriver Set (Item 56757) and the clasp set’s provided screws to attach the clasp.
- Similar to step 5, install the two hinges with their provided screws on F1 and F2.
- Use your wood glue and line the inside of the box with the felt. Optional: Sew a simple pillow 3.5 in. x 3.5 in. out of fabric to hold your watch. Fill about 75% of it with plain pony beads.
Tag #HarborFreightProjects to Have Your Project Featured!